Laying Floor Tiles
You are here:
Home Page > Decorating A Loft Conversion > Laying Floor Tiles
Once you have that new loft conversion finished you will need to decorate and part of that will invaribly involve laying new flooring. And, if you are using tiles, then this page is for you.
The good news is that many of the techniques involved in laying tiles is pretty much the same whether you are using rigid or soft tiles.
The most important thing is that the surface on which they will be laid is level. If not it will be impossible to achieve the best results.
This point should be mute if you are tiling a newly built loft conversion as the new floor should be perfect. If, however, you are working on an older conversion or in another room in the house than the floor needs to be levelled using plywood or chipboard before you begin laying the tiles.

Laying Soft Floor Tiles
Types of soft floor tiles include vinyl and cork as well as carpet tiles. The advantage of using these kind of tiles is that they are inexpensive to buy and very easy to cut with just a sharp craft knife.
The first task is to mark out the floor. Many of us choose to skip this step but it is quick and easy to do and should result in an easier job. So it is worth taking a little extra time to do this.
Basically all you are doing is dividing the floor into four quarters. Do this by chalking or pencilling a line between two opposite walls.
At this point lay the tiles loosely (ie, don't fix them down) from the centre of the line to the right hand wall.
Once a row has been put in place, of the gap between the right edge of the last tile and the wall is less than half a tile width, move the line to the right so the row fits perfectly.
Then draw a line from the two other walls so the two lines bisect each other making four quarters.
Repeat the loose tile laying procedure to get a perfect fit to one wall and move the line accordingly.
Finally, place a timber guide batten butting up against the centre line. You are now ready to permanently fix the tiles in place.
Laying Floor Tiles
As there are a few different types of soft floor tiles we will look at each one in turn.
Laying Floor Tiles - Self Adhesive Tiles
Very easy to lay the only preparation needed for these tiles is to leave them in the room in which they will be laid for around 24 hours prior to fixing them down.
This will ensure a more snug fit.
To lay the first tile peel away the protective paper backing and, ensuring any pattern is going in the right direction, Press the edge of the tile snugly against the timber batten with one corner of the tile aligned with the junction of the two chalked lines.
Lay the second tile butted on the other side of the line butted firmly up against the first tile. Carry on laying the tiles (it is usually best to work to a pyramid shape) until the first half of the room is complete then do exactly the same on the other side of the room.
Of course not all rooms are perfectly square but vinyl tiles are very easy to cut with a craft knife and they can be trimmed to fit any space. A useful tip for tiling around awkward obstacles such as toilet fittings is to cut a cardboard template.
Cut 'fingers' in the end of the piece of card so that when butted up against the obstacle they splay upwards allowing a much more accurate temple to be made.
Once all the tiles have been laid fit a threshold bar across doorways before wiping the tiles with a damp cloth.
Laying Floor Tiles - Carpet Tiles
Carpet tiles are laid just like self adhesive vinyl tiles except that they not clued.
Mark out the floor in the same way as described above, though the guide batten isn't really necessary, and lay the tiles making sure they are all laid in the same direction as the arrows on their back. This is to ensure the pile of the carpet is pointed in the correct direction.
In heavily used areas it is best to stick not each tile with double sided tape though in less trafficked areas it is sufficient to stick every second or third tile. Any trimming that is necessary can be done quite easily with a sharp craft knife.
Laying Floor Tiles - Cork Tiles
Again, mark out the room as we described at the top of this page. Cork tiles must be stuck down with a contact adhesive but it is important to make sure they are level. This can be done by gently tapping down the edges of the tiles with a small block of wood. Don't hammer them or you will have pieces of cork flying all over the place!
Most cork tiles sold nowadays are 'finished' and ready for use. If however you have used unfinished tiles then once laid they need to be sealed by using clear varnish. You will need at least two coats of varnish to do the job.
Laying Floor Tiles - Ceramic Floor Tiles
When it comes to laying floor tiles it is a similar procedure for using ceramic tiles as it is for soft tiles.
Ceramic floor tiles are becoming more popular with homeowners as they are very hard wearing and look great. Yes, they are more expensive than the softer tiles but they can make a fantastic difference to a room.

Ceramic tiles are of course very heavy and to cut them to shape you must use the type of cutting jig that is used for wall tiles.
Mark out the floor in the usual way but put two timber guide battens on the edges of two walls at right angles. Fit the first tile into the angle of the two battens and work outwards.
Use adhesive that is water proof and only do a square metre at a time and make sure any excess adhesive is quickly wiped away. Don't worry about fitting the tiles flush to the walls at this stage.
Once the room is finished leave the tiles for 24 hours before removing the timber battens and filling in the gaps with cut tiles.
For more info see the related pages below
Laying Floor Tiles? Don't Forget About Insulation


Be Prepared!

Latest Headlines

Search This Site

Take Me Home!

Latest Articles
-
What Is Vermiculite Loft Insulation?
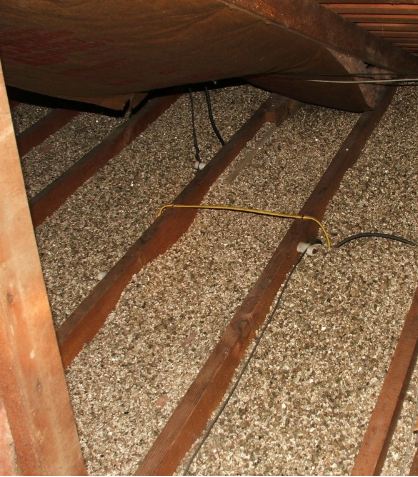 Vermiculite Loft Insulation is an echo-friendly alternative to traditional insulation materials
 -
The Loft Water Tank Moving And Repositioning
The old loft water tank will need to be moved if the roof space is being converted into a habitable room -
Structural Calculations For Loft Conversions
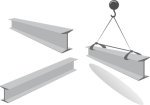 Structural calculations for loft conversions are of course hugely important to ensure safety and that the proposed plans meet building regulations