Dormer Construction
Building The Structure
You are here:
Home Page > Adding A Dormer > Dormer Construction
For any loft conversion project the construction of the dormer and its design phase is vital in ensuring that the available space is maximised to ensure adequate headroom is available.
For the purposes of this article lets look at a typical flat roofed box dormer though there other options and designs open to you.
The Process in a Nutshell
Building the structure usually follows a well worn path with the first phase being for the builders to cut into the existing roof and removing the tiles and battens.
The structure itself is then put together with a timber frame that is then dropped into the hole. The usual arrangement for building the framing is to use vertical studs between a timber head beam and base plate for maximum strength.
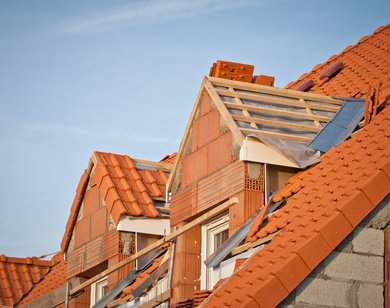
Once the structure is in place the windows will be installed. The dormers roof is then built and put in place before the whole structure is clad with material such as tile, boarding or Upvc.
The Build
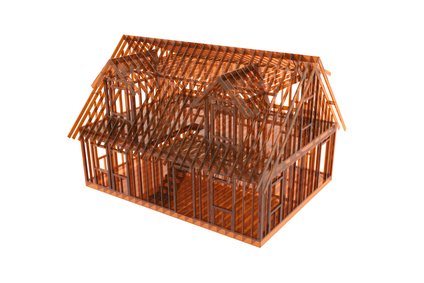
To a layman framing dormers looks very complicated and involved.
Fortunately thought most joiners or carpenters will have little trouble in putting together the timber studwork.
And there are good reasons why dormers are usually constructed from (soft) wood.
The first and probably most important point in using softwood for dormer construction is that the finished structure is light and also very strong.
They can also be constructed very quickly. Once the existing roof tiles and battens have been removed to leave a gap in the roof it is time to begin the dormer construction.
The first step in actually putting the structure together is to build the base plate or sole plate as it is often called.
The base plate is the length of timber to which the bottom of the vertical studs are fixed.

The base plate will then be fitted to a steel beam or or sometimes directly to the joists of the new floor. It could also be possibly fitted to the wall if building up from the main wall. It is important that structural calculations are taken into consideration here because there may be a minimum strength requirement for the studs if the new structure is load bearing.
The studs themselves will be made from 4x2 (sometimes larger) timber with no more than a 350mm gap between each.
Equal spacing is desirable but not always practical depending on the size of loft windows being used.
In a dormer it is the front of the structure will has to be strongest and will take on the main burden of load bearing.
To accomplish this a timber head beam is used. This beam will take the loading from the front of the dormers roof so its specifications will have previously being noted in the plans submitted to the councils building control officers.
The beam runs horizontally across the top of the vertical studs and will support the loading from the dormers flat roof.
The built up sides of the dormer construction are called ‘cheeks’.
The sides, or cheeks, of the structure are not normally load bearing so the dormer framing studs are often fixed to the existing rafters in the roof.
Although not always needed it is always best practise to install at least one row of noggins throughout the dormer framing.
The noggins won’t add significantly to the weight of the dormer and but will increase its strength.
Once the timber structure is in place the sheathing needs to be added along with breather membrane before the new structure if finished off with cladding.
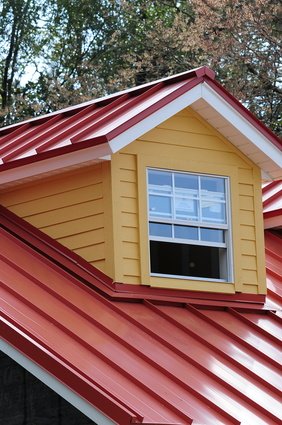
The Windows
A windowless dormer is very uncommon. In fact why on earth anyone would build without windows is quite beyond me though to my surprise I have come across such a thing.
Assuming that you want a view, fresh air and natural light in your loft conversion then a suitably sized opening needs to be left in the timber framework though remember that extra vertical studs will be needed to support the window.
Weather Proofing
The first step in protecting the dormer from the vagaries of the British weather is to clad the framework with timber sheathing.
Plywood sheeting is usually used for this and its purpose is to provide a backing for the insulation as well as keeping out the wind and rain.
The external facing side of the sheathing then needs to be covered with overlapping sheets of breather membrane. As its name suggests the main function of the membrane is to let condensation escape.
The final step in dormer construction is to fix battens to the sheathing onto which the final covering of tiles or lead sheet is fixed to complete the cladding.
For more info see the related pages below
Guide To The Building Regulations
A Gable Dormer
Quirky Dormer Construction - What Are Eyebrow Dormers?


Be Prepared!

Latest Headlines

Search This Site

Take Me Home!

Latest Articles
-
What Is Vermiculite Loft Insulation?
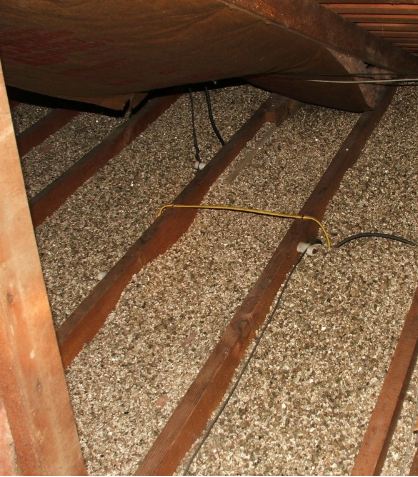 Vermiculite Loft Insulation is an echo-friendly alternative to traditional insulation materials
 -
The Loft Water Tank Moving And Repositioning
The old loft water tank will need to be moved if the roof space is being converted into a habitable room -
Structural Calculations For Loft Conversions
 Structural calculations for loft conversions are of course hugely important to ensure safety and that the proposed plans meet building regulations